See my update to this design here.
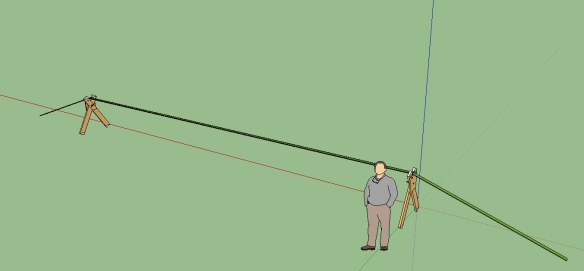
Today’s post is about making Slackline A-Frames. I developed these for use when there are no trees around, or when you want to attach to the base of a small tree, or to a vehicle’s trailer-hitch*. The following picture shows the general idea of using A-Frames for Slackline. Photos of the real thing are down below.
Each A-Frame is made from one piece of 2×6 lumber, 8 feet long. These can be purchased at local home improvement centers for about $5 each. In addition, I use a piece of 3/4″ plywood, some nuts and bolts, and a piece of 1/2″ black iron pipe.
These A-Frames disassemble for ease of transport.
Parts List (enough for two A-Frames):
- Qty 2, 2x6x8′ lumber
- Qty 2, 12″x10″ plywood, 3/4″ thick
- Qty 2, 12″ piece of 1/2″ black iron pipe
- Qty 2, 1/2″-20 x 3″ eyebolts
- Qty 4, 1/2″-20 x 3″ bolts
- Qty 6, 1/2″-20 wing nuts
- Qty 12, 1/2″ washers
Using 4-foot legs results in the Slackline being 3 feet off the ground when suspended between the frames and tightened for walking.
To make an A-Frame, follow these steps:
- Cut one of the 2x6s in half, resulting in two 4-foot lengths of 2×6. Two 4-foot lengths make one A-Frame.
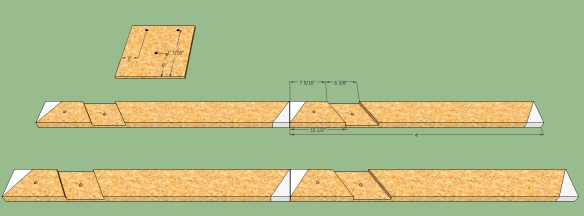
- Cut a 60 degree half-lap in each leg. It is important to be sure you make two identical pieces. In other words, cut the half-lap in each piece using the same orientation. In the picture below, you can see the cut-out diagram. The white parts are the waste. Look carefully, all four pieces (for two A-Frames) are identical.
- Carefully cut the ends off the 2x6s at 60 degree angles, but in the opposite direction of the half laps. See picture below. Pay very close attention to this detail. If you cut the ends of the legs in the wrong direction, you will have to start over!
- Clamp two half-lapped pieces together, and drill a 1/2″ hole in the center of the two half laps.
- Drill a 1/2″ hole in the center of a plywood piece.
- Insert a bolt through the plywood and the A-Frame and tighten.
- Orient the plywood to the A-Frame, and drill two more 1/2″ holes in the plywood and the A-Frame legs.
 At this point, you can assemble one of the A-Frames and it should look like the picture below.
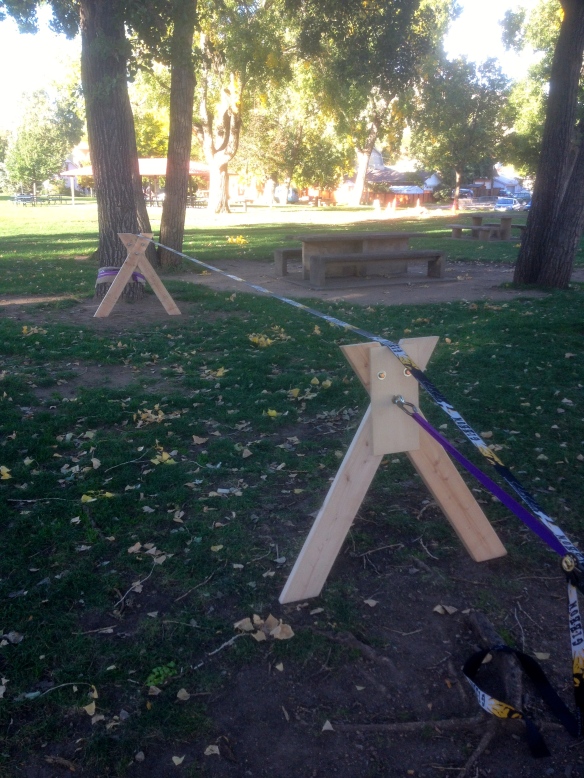
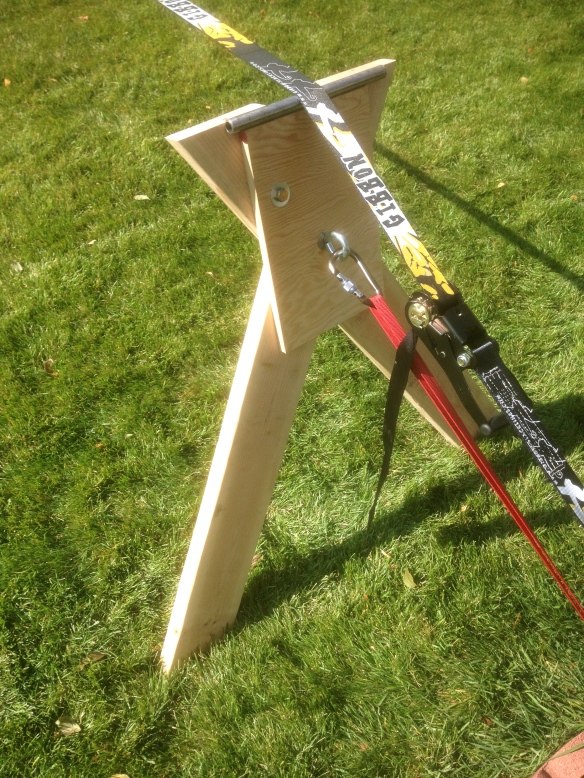 Notice that the eyebolt goes in the plywood’s center hole, and the Eye faces the anchor point (in the ground, or at the base of a tree). Connect an anchor line (with carabiner) between the eyebolt and the same point on ground or tree where the Slackline connects. This prevents the A-Frame from falling inward.
The other two bolts can go either direction. All three bolts have a wing-nut and washers for added stability.
Be sure to include one of the 12″ pipe lengths under the Slackline at the top of the A-Frame (see picture above). This prevents the edge of the plywood from wearing out the Slackline due to a friction rub. I tried putting a quarter-roundover on the edge of the plywood, but the wood rubbed the line too much. This is why I added the pipe.
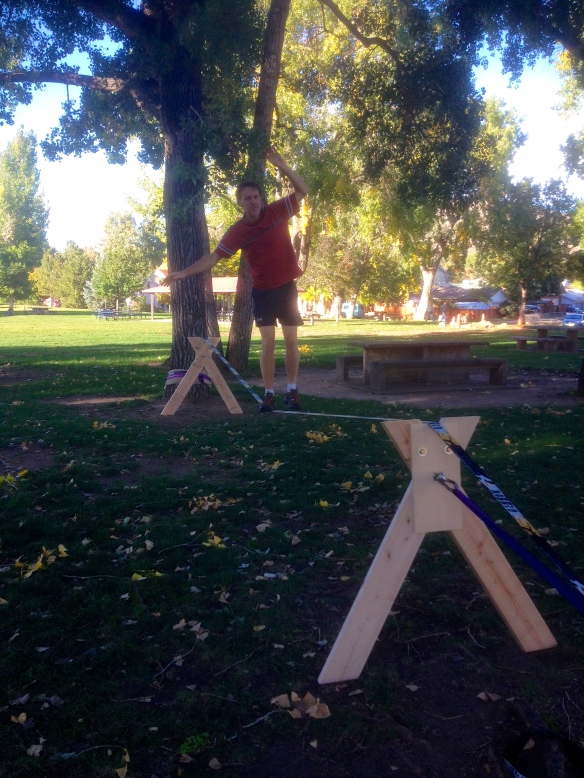
Here are a few more pictures showing the setup and use of these A-Frames.
This first picture shows the whole setup, and although we used large enough trees, the point was to attach the line close to the base, and use the A-Frames for complete support. These first two pics were taken before I decided to add the 12″ pipe (to prevent friction rub on the line).
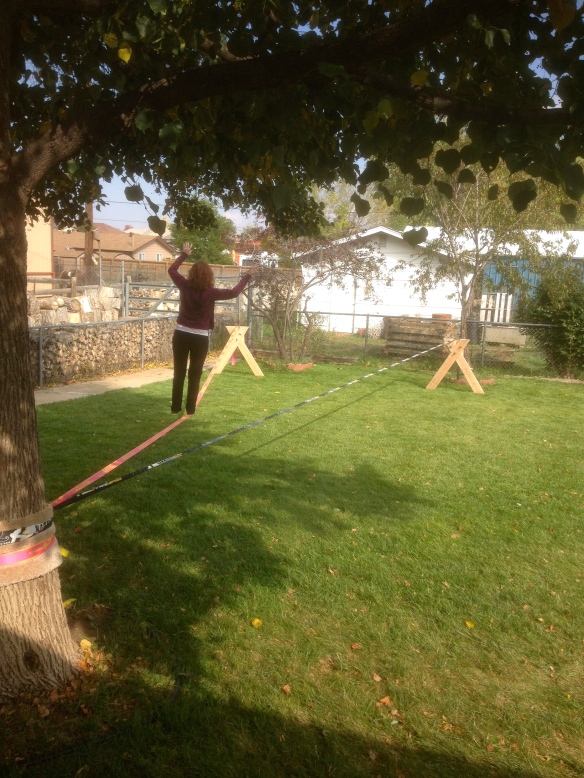 If you make these, please tell me how you did. I find these to be a great way to setup a Slackline, and look forward to using them in places where there are not big trees.
See my update to this design here.
* Be extra cautious if you use a vehicle’s trailer hitch to anchor a Slackline, the last thing you want to do is move/drive the vehicle while the Slackline is connected. That’s a great way to destroy a Slackline. You have been warned!
