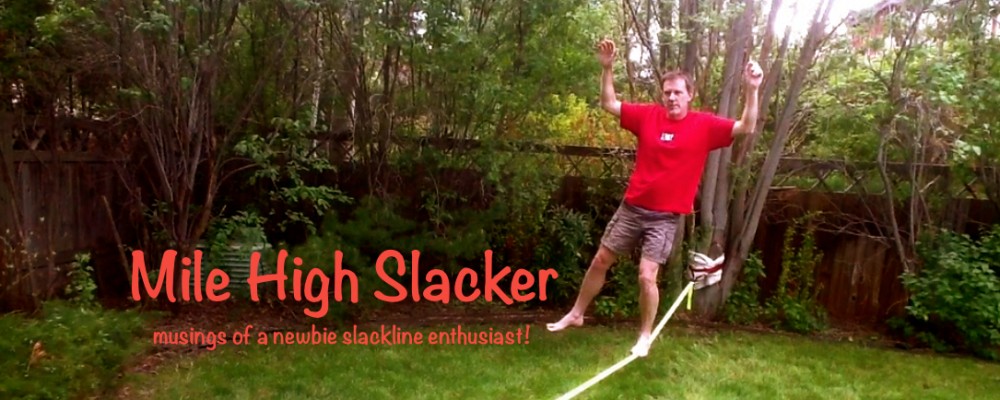
Today’s video demonstrates a few moves to practice. I made this video for my cousins who are progressing nicely in their slacking careers! The video shows a chongo mount, a middle of the line squat, kneeling on the line, and a squat in “exposure” (facing out perpendicular to the line).
This past weekend, the kids over at Colorado School of Mines held a slackline festival. There were tons of slacklines set up, and people of all ages and skill levels participating in the fun! We were near this particular 150′ line, so I decided to practice my chongo mount. The video below shows one of my attempts. Although I did not walk far, I was mostly trying to mount the dang thing! Later in the day, I was able to walk 10 steps (at the opposite end of the line).
Today’s post is about making Slackline A-Frames. I developed these for use when there are no trees around, or when you want to attach to the base of a small tree, or to a vehicle’s trailer-hitch*. The following picture shows the general idea of using A-Frames for Slackline. Photos of the real thing are down below.
Each A-Frame is made from one piece of 2×6 lumber, 8 feet long. These can be purchased at local home improvement centers for about $5 each. In addition, I use a piece of 3/4″ plywood, some nuts and bolts, and a piece of 1/2″ black iron pipe.
These A-Frames disassemble for ease of transport.
Parts List (enough for two A-Frames):
Qty 2, 2x6x8′ lumber
Qty 2, 12″x10″ plywood, 3/4″ thick
Qty 2, 12″ piece of 1/2″ black iron pipe
Qty 2, 1/2″-20 x 3″ eyebolts
Qty 4, 1/2″-20 x 3″ bolts
Qty 6, 1/2″-20 wing nuts
Qty 12, 1/2″ washers
Using 4-foot legs results in the Slackline being 3 feet off the ground when suspended between the frames and tightened for walking.
To make an A-Frame, follow these steps:
Cut one of the 2x6s in half, resulting in two 4-foot lengths of 2×6. Two 4-foot lengths make one A-Frame.
Cut a 60 degree half-lap in each leg. It is important to be sure you make two identical pieces. In other words, cut the half-lap in each piece using the same orientation. In the picture below, you can see the cut-out diagram. The white parts are the waste. Look carefully, all four pieces (for two A-Frames) are identical.
Carefully cut the ends off the 2x6s at 60 degree angles, but in the opposite direction of the half laps. See picture below. Pay very close attention to this detail. If you cut the ends of the legs in the wrong direction, you will have to start over!
Clamp two half-lapped pieces together, and drill a 1/2″ hole in the center of the two half laps.
Drill a 1/2″ hole in the center of a plywood piece.
Insert a bolt through the plywood and the A-Frame and tighten.
Orient the plywood to the A-Frame, and drill two more 1/2″ holes in the plywood and the A-Frame legs.
At this point, you can assemble one of the A-Frames and it should look like the picture below.
Notice that the eyebolt goes in the plywood’s center hole, and the Eye faces the anchor point (in the ground, or at the base of a tree). Connect an anchor line (with carabiner) between the eyebolt and the same point on ground or tree where the Slackline connects. This prevents the A-Frame from falling inward.
The other two bolts can go either direction. All three bolts have a wing-nut and washers for added stability.
Be sure to include one of the 12″ pipe lengths under the Slackline at the top of the A-Frame (see picture above). This prevents the edge of the plywood from wearing out the Slackline due to a friction rub. I tried putting a quarter-roundover on the edge of the plywood, but the wood rubbed the line too much. This is why I added the pipe.
Here are a few more pictures showing the setup and use of these A-Frames.
This first picture shows the whole setup, and although we used large enough trees, the point was to attach the line close to the base, and use the A-Frames for complete support. These first two pics were taken before I decided to add the 12″ pipe (to prevent friction rub on the line).
If you make these, please tell me how you did. I find these to be a great way to setup a Slackline, and look forward to using them in places where there are not big trees.
* Be extra cautious if you use a vehicle’s trailer hitch to anchor a Slackline, the last thing you want to do is move/drive the vehicle while the Slackline is connected. That’s a great way to destroy a Slackline. You have been warned!
After 3 to 4 months of Slacklining, and teaching others along the way, I wanted to make a post about learning to do it. After hundreds of hours on the line, and seeing/teaching 50-100 people to enjoy this sport, I’d like to summarize things I’ve learned.
First, take a look at the above video. It is the one I used when starting out, and it is basically the techniques I use when I help people learn. Below, I expand a bit on the video’s content, and add my personal experiences.
One very important point about Slackline is that people of all ages can learn to Slackline! I’m 49, my wife is 46, and I have helped people from 7 to 67 learn to stand on the line. With a line set at knee height, over a grassy area, there really is no danger of injury.
Tips for your first time:
Keep your foot inline with the Slackline, not across it. Heel and toe on the line.
Focus on something in the distance (like a tree, DON’T look down at the line!)
Hands up in the air, not out to your side. Signal for a touchdown!
Bend your knee slightly. Do not lock your knee.
Breathe. If you stop breathing, you will eventually fall off the line! 🙂
Additional tips:
Learn to Slackline in bare feet.
Learn to stand on the line with one foot BEFORE you try to walk.
Start with a shorter line. Learning on a 25′ line is easier than on 30-50′
Set the line at knee height.
Start about 4 feet from the fixed end of the line. Away from the adjustment gear.
Keep your head over the line, use your hands (and free leg) for balance support.
Hold someone’s hand to help you get on the line the first couple times.
Practice on each leg. Obtain the same ability in both legs before you walk.
Touch your fixed foot with your free leg to help stop the shaking.
Take 3-5 minute breaks after every 3 or 4 attempts (per leg). Build muscle memory.
Don’t worry, most people get up their first time and they stand there for about 1/4 to 1/2 of a second. This is NORMAL! The shaking that occurs when you try to stand your first few times happens to everyone! Do not be discouraged, rather be encouraged by the progress you make in the first 15 minutes. Within three or four tries, you will be able to stand on one foot for 2 or 3 seconds. That is MAJOR improvement! Keep up the good work.
At first, your leg(s) will shake uncontrollably. This makes most people smile or laugh, which is an indication they are having fun, and that they appreciate the gravity of the situation! For the first 15 minutes or so that you try to stand on the line, the shaking will cause you to fall. But, all this time, your leg is learning to control the line. After 15-20 mins your leg will stop the shaking all by itself! You don’t even think about it, your leg takes care of the shaking. You will know you are at this point when the line starts to shake, but then it stops, and you don’t fall off!
Once your leg(s) begin to control the shaking, you can now focus your energy on fine tuning your balance. Your goal is to maximize the amount of time you can stay on the line. Two seconds, three seconds, five seconds, eight seconds, great! Once you get to ten seconds of standing, per leg, you are almost ready to take your first step! Getting to this point takes most adults about 45-60 mins of practice. Some people are faster (kids), but most people need about an hour.
If you can get up and stand on each leg for ten to fifteen seconds, you are ready to try walking. Not walking per se, but really, changing feet. After a while, standing there for fifteen seconds will get old; so bring your free foot over to the line slowly, and work to put it in front of the foot you already have on the line. As soon as you can: transfer your weight to the forward foot, take the previous foot off the line, and regain your balance using the new free foot and your hands. Try to spend very little time with both feet on the line. The important part here is to switch from one foot to the other. Nothing more. Also, don’t take any more than ONE step before stopping to regain your balance. Consecutive steps will come later as you improve. Practice this simple transfer of weight/switching of feet, and you are well on your way to becoming a true Slacker!
I have seen people learn to walk in as little as 20 mins. Those people are rare, usually kids who are 13-18 and who do some kind of regular sporting activity. The rest of us, myself included, take about an hour of time on the line before we are “walking.” But all the while, I find that people are very intent on mastering the Slackline.
Drive and determination overcome most people who try their hand (err, foot) at Slackline. In my experience, people and Slacklines go together very well. It gives me a lot of joy when anyone approaches us in the park and shows interest. People of all ages find it intriguing, and I am always happy to let anyone have a go. I encourage it!
Lastly, there is the question of 1-inch versus 2-inch. Personally, I learned on a 1-inch line (see my blog!), and having spent some time on 2-inch lines, I would have to say that for beginners there probably isn’t much difference between them. What I mean is, it is likely going to take just about the same amount of time and effort to learn Slackline which ever way you go. People I have taught notice a difference between the two types of line, but they don’t really say they prefer one over the other. At least not until they get a bit more experience under their belts.
Learning Slackline takes time but, like learning to walk on solid ground, people make remarkable progress in the beginning. This is one of the things that makes Slackline so much fun – It seems insurmountable at first, but the progress people make in the early stages encourages them to keep going. Before they know it, the impossibility of it all disappears and, they are having a great time taking their first step. I believe this is true whether learning on a 1-inch or a 2-inch line. Don’t be afraid to try either or both!
Thanks for reading, and good luck on your first Slackline adventure!
Having gained an interest by reading blogs and other sites, I felt I was quite prepared (mentally) to begin. One thing I tried to prepare for was the fact that, no matter what, no matter who you are, no matter how much you try to get ready, YOUR LEG WILL SHAKE UNCONTROLLABLY when you first push down on the slackline! We spent about 5 or 10 minutes today and yesterday helping each other up, onto the line – and standing by as a crutch for the person on the line. They are not kidding when they say that your leg will shake! It is hard to believe this is even possible!
On my way to buy the slackline the other day, I had run into a couple guys in the local park who were taking this video for Gibbon, a popular slackline maker. The main guy there, Josh I think, told me to set the height of the line at about my knee when starting out. Great advice! For, although the line shakes, a lower height makes it easier to mount the line. But I must say, it is amazing how much the line shakes. I’m glad I read blogs and watched videos of people actually doing slackline, including this one for beginners. Otherwise I can see where I might be discouraged, and lose confidence that I would ever master this. Fortunately, I am a see-it-and-do-it kind of guy. The line has become a challenge that I must master. Most sites say the best method is to spend time on the line, and while it seems impossible to do right now I know that it will come.
One tricky part about setting the line at knee height is getting enough tension to keep the line from sagging to the ground when a person steps on it. I can see I am probably going to need a way to put more tension in the line. Thinking about that now…