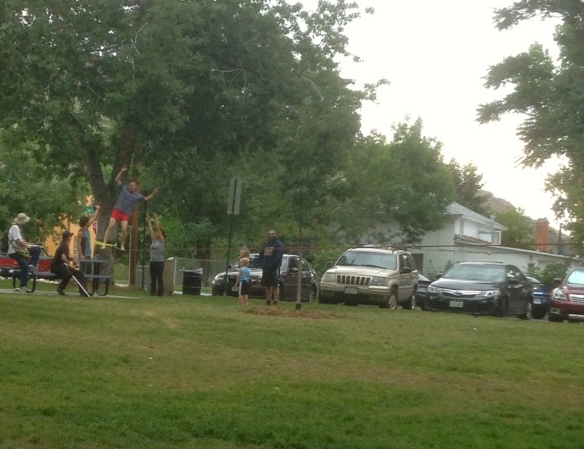
After 3 to 4 months of Slacklining, and teaching others along the way, I wanted to make a post about learning to do it. After hundreds of hours on the line, and seeing/teaching 50-100 people to enjoy this sport, I’d like to summarize things I’ve learned.
First, take a look at the above video. It is the one I used when starting out, and it is basically the techniques I use when I help people learn. Below, I expand a bit on the video’s content, and add my personal experiences.
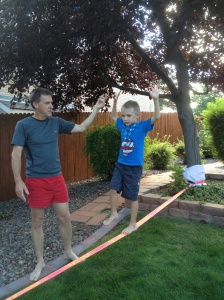
One very important point about Slackline is that people of all ages can learn to Slackline! I’m 49, my wife is 46, and I have helped people from 7 to 67 learn to stand on the line. With a line set at knee height, over a grassy area, there really is no danger of injury.
Tips for your first time:
- Keep your foot inline with the Slackline, not across it. Heel and toe on the line.
- Focus on something in the distance (like a tree, DON’T look down at the line!)
- Hands up in the air, not out to your side. Signal for a touchdown!
- Bend your knee slightly. Do not lock your knee.
- Breathe. If you stop breathing, you will eventually fall off the line! 🙂
Additional tips:
- Learn to Slackline in bare feet.
- Learn to stand on the line with one foot BEFORE you try to walk.
- Start with a shorter line. Learning on a 25′ line is easier than on 30-50′
- Set the line at knee height.
- Start about 4 feet from the fixed end of the line. Away from the adjustment gear.
- Keep your head over the line, use your hands (and free leg) for balance support.
- Hold someone’s hand to help you get on the line the first couple times.
- Practice on each leg. Obtain the same ability in both legs before you walk.
- Touch your fixed foot with your free leg to help stop the shaking.
- Take 3-5 minute breaks after every 3 or 4 attempts (per leg). Build muscle memory.
Don’t worry, most people get up their first time and they stand there for about 1/4 to 1/2 of a second. This is NORMAL! The shaking that occurs when you try to stand your first few times happens to everyone! Do not be discouraged, rather be encouraged by the progress you make in the first 15 minutes. Within three or four tries, you will be able to stand on one foot for 2 or 3 seconds. That is MAJOR improvement! Keep up the good work.
At first, your leg(s) will shake uncontrollably. This makes most people smile or laugh, which is an indication they are having fun, and that they appreciate the gravity of the situation! For the first 15 minutes or so that you try to stand on the line, the shaking will cause you to fall. But, all this time, your leg is learning to control the line. After 15-20 mins your leg will stop the shaking all by itself! You don’t even think about it, your leg takes care of the shaking. You will know you are at this point when the line starts to shake, but then it stops, and you don’t fall off!
Once your leg(s) begin to control the shaking, you can now focus your energy on fine tuning your balance. Your goal is to maximize the amount of time you can stay on the line. Two seconds, three seconds, five seconds, eight seconds, great! Once you get to ten seconds of standing, per leg, you are almost ready to take your first step! Getting to this point takes most adults about 45-60 mins of practice. Some people are faster (kids), but most people need about an hour.
If you can get up and stand on each leg for ten to fifteen seconds, you are ready to try walking. Not walking per se, but really, changing feet. After a while, standing there for fifteen seconds will get old; so bring your free foot over to the line slowly, and work to put it in front of the foot you already have on the line. As soon as you can: transfer your weight to the forward foot, take the previous foot off the line, and regain your balance using the new free foot and your hands. Try to spend very little time with both feet on the line. The important part here is to switch from one foot to the other. Nothing more. Also, don’t take any more than ONE step before stopping to regain your balance. Consecutive steps will come later as you improve. Practice this simple transfer of weight/switching of feet, and you are well on your way to becoming a true Slacker!
I have seen people learn to walk in as little as 20 mins. Those people are rare, usually kids who are 13-18 and who do some kind of regular sporting activity. The rest of us, myself included, take about an hour of time on the line before we are “walking.” But all the while, I find that people are very intent on mastering the Slackline.
Drive and determination overcome most people who try their hand (err, foot) at Slackline. In my experience, people and Slacklines go together very well. It gives me a lot of joy when anyone approaches us in the park and shows interest. People of all ages find it intriguing, and I am always happy to let anyone have a go. I encourage it!
Lastly, there is the question of 1-inch versus 2-inch. Personally, I learned on a 1-inch line (see my blog!), and having spent some time on 2-inch lines, I would have to say that for beginners there probably isn’t much difference between them. What I mean is, it is likely going to take just about the same amount of time and effort to learn Slackline which ever way you go. People I have taught notice a difference between the two types of line, but they don’t really say they prefer one over the other. At least not until they get a bit more experience under their belts.
Learning Slackline takes time but, like learning to walk on solid ground, people make remarkable progress in the beginning. This is one of the things that makes Slackline so much fun – It seems insurmountable at first, but the progress people make in the early stages encourages them to keep going. Before they know it, the impossibility of it all disappears and, they are having a great time taking their first step. I believe this is true whether learning on a 1-inch or a 2-inch line. Don’t be afraid to try either or both!
Thanks for reading, and good luck on your first Slackline adventure!
